As the name suggests, machine embroidery refers to using an embroidery machine to stitch designs or patterns of your choice on your preferred fabric. In the past, machine embroidery was done using traditional sewing machines. But, with the constantly evolving trends, commercial industries and individual embroiderers now use specialist embroidery machines for the same purpose. Unlike traditional sewing machines, specialist embroidery machines allow embroiderers to make more accurate designs, use a more extensive variety of stitches and threads, opt for different color combinations, and, overall, do embroidery on a much larger scale. Machine embroidery is also a far more effective replacement for hand embroidery, which was commonly used to decorate fabrics in multiple cultures and geographical locations.
Are you new to the world of machine embroidery and want to explore it further? This article acts as a comprehensive guide to machine embroidery. Read to find out how machine embroidery is done from start to finish.
Why Should You Do Machine Embroidery?
Before deep diving into the basics of machine embroidery, let us discuss the many lesser-known benefits of machine embroidery and how it has impacted the garment manufacturing and textile production industries. Here are some of the reasons why you need to opt for machine embroidery instead of hand embroidery or using a sewing machine for embroidery.
One of the biggest advantages of machine embroidery is that it allows machine embroiderers to create the same design on each clothing piece which makes it easier for manufacturers to take bulk orders.
Machine embroidery eliminates error to an extent. As long as you know how to do machine embroidery and learn some embroidery basics, you can create error-free embroidery magic on every attire!
Another reason why beginners need to do machine embroidery instead of hand embroidery is that the latter takes much less time. Most of the machine embroidery process is digitized, as discussed further in the article, which allows you to explore your creativity.
Besides taking less time, machine embroidery also requires less effort, which is a win-win situation for everyone.
What Do You Need To Start Your Machine Embroidery Journey?
Like almost every other process, you need to gather some supplies before you start embroidering or go further in the machine embroidery industry. If you have never held an embroidery machine or a thread before, now’s the right time to pop into the shops or online stores and get the required products needed to start machine embroidery. Here’s a list of all the machine embroidery supplies you need to stitch your first design from start to finish.
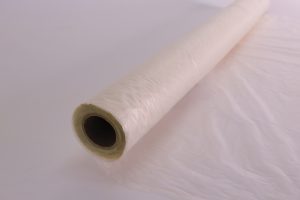
Machine Embroidery Stabilizer
Contrary to popular belief, you can’t do machine embroidery with just a thread, a machine, and some fabrics of your choice. Instead, you have to research and gather some lesser-known supplies. One of these supplies is the machine embroidery stabilizer. For those who don’t know, a machine embroidery stabilizer is a synthetic material that is added beneath the fabric you’re stitching on for additional support.
A stabilizer is essential for creating even the most basic embroidery design, as without one your fabric can get stuck in the needles or end up as a torn mess. Additionally, without a stabilizer, you can’t place the threads accurately which can ruin the entire design.
However, you might be surprised to know that the market is filled with multiple types of stabilizers and you need to pick one that suits your fabric and your embroidery design. Here are some common stabilizer types and a guide on choosing the right one for your first embroidery project.
The most common type of stabilizers are cut-away stabilizers. These are super reliable and stable as you can just remove the excess material once you’re done with your embroidery design. This makes them the optimal choice for creating dense embroidery on unstable fabrics like stretchy material.
On the other hand, tear-away stabilizers are highly-unstable. As the name suggests, you can just tear the material away from the back of your fabric once the embroidery design is done. This makes them ideal for stable and non-stretchy fabrics that don’t get torn when you pull away the stabilizer. Additionally, you should only use these for simple designs, as the threads of dense embroidery patterns can break or get ruined if you tear away the stabilizer at the end.
As the name suggests, wash-away stabilizers allow you to wash the clothes after the embroidery is finished. These stabilizers get dissolved in the water once you wash them, which saves you the hassle of removing them. These are more stable than tear-away stabilizers and are ideal for fabrics or designs that don’t get ruined by washing the fabric post-embroidery.
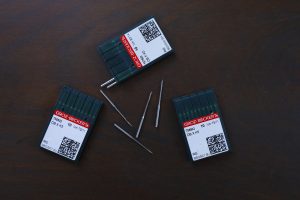
Needles For Machine Embroidery
The next machine embroidery supply that every beginner needs to purchase is the ideal machine embroidery needle. Some people make the mistake of using regular sewing needles instead of buying needles specifically designed for machine embroidery. Machine embroidery needles are thicker, which allows embroiderers to fix embroidery thread in the machine. The wider size and elongated design of a machine embroidery needle reduce thread friction, which results in lesser thread breakage.
However, embroiderers need to remember that they should pick different kinds of needles for varying embroidery projects. Your ideal needle depends upon the kind and weight of the fabric you’re using for embroidery. The rule of thumb is that the heavier your fabric, the larger and thicker your needle should be. Additionally, needles also have the following three kinds of tips.
Rounded or ballpoint needles are ideal for knitted fabrics where you don’t want to pierce the cloth
Sharp or pointed needles are the right option for heavier, thicker, and denser fabrics
Universal needles, which are neither sharp nor rounded, and work well with most kinds of fabrics
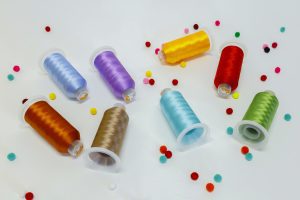
Machine Embroidery Threads
It’s no secret that no embroidery design is complete without threads. Anyone who wants to start their embroidery journey this year needs to invest in strong, stable, and high-quality embroidery threads. Just like needles, you can’t use the same threads that you use for sewing as machine embroidery creates more friction than sewing, which can result in regular threads breaking easily. In contrast, embroidery machine threads are ideal for long-lasting embroidery designs due to their sheen and strength.
Here are some common machine embroidery thread materials you can consider gathering before starting machine embroidery.
Polyester embroidery threads are the industry standard due to their strong material, professional look, and several color options
Rayon embroidery threads are stronger than other threads, which makes them the ideal choice for creating intricate embroidery designs or for high-speed stitching embroidery projects
Cotton embroidery threads have a softer sheen and feel and give a matte touch to different embroidery designs
Silk embroidery threads have a luxurious look, which makes them the perfect choice for producing high-end embroidery designs on expensive fabrics
Metallic embroidery threads are less popular and are used in projects where people want to add a metallic or funky touch to their embroidery designs
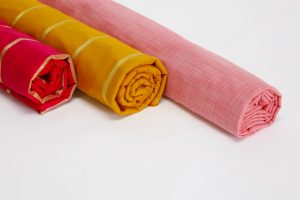
Fabrics For Machine Embroidery
Like threads, the ideal fabric is another staple for machine embroidery. You can purchase any kind of fabric you want. However, for your first embroidery project, it’s advisable to select a fabric that isn’t thicker than 6mm. We also recommend pre-washing the fabric before embroidery to prevent shrinking and messing up the design, which can happen if you wash the fabric after you have stitched the embroidery. Some common fabric ideas include silk, cotton, linen, and wool. But the list is endless and you can choose any fabric material.
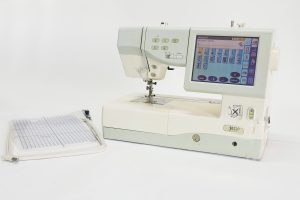
Embroidery Machine
Of course, the most important supply you need for machine embroidery is an embroidery machine. Hundreds of embroidery machines are available in the market. It’s advisable to conduct in-depth research before selecting an embroidery machine and using it to start your embroidery journey this year. We also recommend getting the perfect hoop for your embroidery machine alongside.
Step-By-Step Guide To Doing Machine Embroidery
Once you have gathered all the required supplies, what’s stopping you from getting down to business and starting embroidery? Here’s how to stitch your first embroidery design from the start to finish.
Step # 1 — Prepare Designs
Most embroidery machines come with various built-in designs and you can use them to create embroidery on fabric. However, if your embroidery machine doesn’t have designs or you want to use a different embroidery design, you can download your preferred designs online. Additionally, you can create your own embroidery designs using your digitizing software. But we don’t recommend doing this for your first embroidery stitching experience. Designs you download again or make yourself on a computer need to be edited and converted to a format that’s accepted by your embroidery machine, which can be a huge hassle for first-time machine embroiderers.
Step # 2 — Mark Your Fabric
Marking your fabric is the next step of embroidery using an embroidery machine. Also called making embroidery blanks, this step requires embroiderers to mark the preferred point on the fabric where they want to stitch the embroidery design. You can mark the point using a washable marker or pen and then create a horizontal and vertical line joining the stitching mark.
Step # 3 — Hooping The Fabric
Hooping the fabric correctly is essential to do embroidery, especially if you’re a beginner. In this step, you have to take a hoop, place your selected stabilizer on top of the bottom surface, and place the fabric on top. Once the stabilizer and fabric is set, you should fix it by bringing down the top surface. This will secure the stabilizer and fabric, preparing your machine for the next step. However, if your fabric is too small to be hooped, you can float it. Floating the fabric means securing the stabilizer in the hoop and then sticking the fabric on the top.
Step # 4 — Set The Needle And Stitch Away
Once your machine, design, and the fabric is set, recheck everything, and place the hoop beneath the needle. Press the start button on your embroidery machine, select the design, and see the magic blossoming in front of your eyes.
Conclusion
Creating embroidery designs on a piece of fabric is a smooth and enjoyable process, especially if you learn the details of machine embroidery and explore this innovative world on your own! With this guide, you make your first embroidery design from start to finish. We hope that this guide was helpful, and with constant practice, you can start doing embroidery regularly or even expand it to a commercial level. Gather those supplies, read this guide, and start embroidering. Good luck!
Copyright © 2017 Candle. All rights reserved.