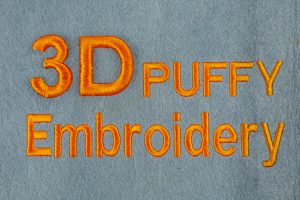
You must have noticed 3D embroidery around you on different items and must have wondered how it is made and what goes behind the scene. 3D puffy foam embroidery is a modern twist in the conventional embroidery world and adds extra aesthetics to the two-dimensional embroidered items. It looks raised and like real object which makes it a mandatory inventory item for any professional embroiderer who wants to run a successful business. If you want to know complete details, dive into this article as this is a complete guide for 3D puffy foam embroidery.
Puffy foam is incorporated to make 3D embroidery that adds a dimension to your embroidery. Commercially logos caps and bag packs are made through 3D embroidery using foam. These logos can be made using craft foam and embroidery foam. Although digitizing for puffy foam embroidery may seem tricky in the beginning even to the seasoned embroiderers but if you follow the complete steps and follow few rules, you can easily achieve reasonable results.

Which 3D Foam Should You Buy
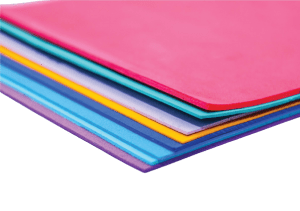
As mentioned earlier there are two types of foam that are used. Craft foam is the most commonly used foam but it has its own disadvantages. This foam is not machine washable and can disintegrate during the embroidery process hence being stuck in the machine which can cause damage to the machine and can make cleaning really lengthy process. If you are using it for very light projects, make sure to not use adhesive craft foam which can stick to your machine and can gum it up.
If you are using machine to embroider any 3D project, foam which is suitable for this purpose should be used only so that it can with-stand the wear and tear and can be washed as well. This will also save a lot of cost which you might incur in case of any damage to the machine.
Before making the decision to use any foam, ensure that you understand complexity and all prerequisites of the design and make an informed decision accordingly.
What Stabilizer Should I Use For 3D Puffy Foam Embroidery
The answer to this question relies on the type of garment you need to embroider on.
If you are doing the 3D puffy foam embroidery on wearable garments then you need to use a cutaway mesh which will not be visible on the garment and can be washed easily without any trouble.
If you are embroidering on objects that are not frequently washed then you can definitely use tear-away Stabilizers as they can be removed by tearing away (as the name suggests). Since items like caps, hats and bag packs are not washed often, this will help with the foam longevity used in the 3D embroidery.
How To Digitize 3D Puffy Foam Machine Embroidery Designs
If you want to digitize 3D puffy foam embroidery you have to keep couple of considerations in mind.
Firstly, you need to understand that digitizing 3D embroidery is quite different from regular digitizing as it adds a new element that is foam to the already tricky mix.
Digitizing 3D puffy foam embroidery can be quite a learning curve for even season digitizers.
Even though the results are very appealing, it should be used only when needed as it requires a lot of work. Three important areas that demand special attention are density, angles and tension of threads.
Foam is appropriate for bigger columned objects and text. Before starting to digitize 3D Foam embroidery, evaluate the design and troubleshoot any challenges in advance to save energy and time on the project. If you are a professional, then best approach would be to give realistic expectation to the customers in advance to keep any commitment related to foam embroidery.
How To Embroider 3D Puff Foam: Steps & Overview
Embroidering On Puffy Foam
To begin follow the usual steps of hooping the fabric and the stabilizer. Cut the foam according to the dimensions required on the design and float it on the fabric. To hold the foam in one place spray adhesive on the corners. Next, loosen the thread to ensure that there is no excessive pressure on the foam and it is not pushed down. Let’s look at detailed steps to follow.
-
Even when doing foam embroidery, you have to run the regular essential steps of the embroidery which includes hooping the base fabric and the stabilizer to be used. Complete the embroidery that does not require 3D puffy foam in it.
-
Next step is to stop the machine as once you are done with other colors, your information sheet will say the word foam and suggest a color. At this point you should move the design to the top and stop your machine to give space for the foam.
-
Spray adhesive to the corners and lay the foam on the design. Ensure using same color of thread as the foam to give it a neat look otherwise contrasting colors will look really untidy. Highest layer of the planning needs to be typically double in density than the rest.
-
When you begin to stitch, do the tack-down stitches first to secure the foam in one place.
-
Everyone has different machine which have slightly different language used to elaborate the density values so explaining the process in terms of percentage will make more sense. For instance, if normal density is 100% then foam will require 50% more density than usual.
-
You might have to increase the number of short stitches or elongate them to ensure more coverage in the corners.
-
Foam can show gaps if you don’t cover enough by overlapping
-
Foam will also require more pull compensation than usual so add that in advance.
-
Proceed the design till all the areas are finished. Now remove foam by tearing it away. Generally, it tears away very easily.
Additional Tips
-
Ensure that the top layer is double in density than the base layer. Put thick layer of satin stitch if your machine has this option. Otherwise sew twice with satin stitch in those areas.
-
Always complete the fill stitch before starting the satin stitch. Use adhesive spray to keep foam in one place then stitch underlay and satin stitches and remove the foam.
-
Secure the foam enough with satin stitches and perforate the sides to easily remove the excess.
-
Place a cloth on the design and use iron to press away any extra stray strands of foam from the design.
-
Always use satin stitch for 3D puffy foam embroidery as this stitch doesn’t push the foam within the object.
-
Ensure penetration of needle from different angles so that foam tears away easily.
-
Tape can be used in the corners to hold the foam in place.
-
Since the excess foam has to be removed at the end of the process, ensure that the foam is not very strong and stiff otherwise it will be very difficult to remove it.
-
Try to use a similar color embroidery thread to your foam, in order to easily cover up your minor mistakes. This will also give you a perfect finishing to your final product.
Difference Between The 3D Embroidery Designs Flat Embroidery Designs
Flat embroidery design is a 2D embroidery that is made using embroidery threads lying flat on the product on which the design is to be made
Whereas, in 3D embroidery a layer of foam is added which is then covered with a sheet of embroidery thread.
When you digitize a design for conventional embroidery or 3D embroidery using foam, there is a lot of difference hence it is always a necessary step to digitize a design separately when using 3D foam.
When a specialized Foam digitization is used, it differs from conventional in terms of density and underlay to ensure that foam is accommodated and is not squished.
How Much Should You Charge?
For any professional embroiderer, price is a very pivoting question. Every professional wants to charge for their efforts yet make sure they are not overpriced. 3D foam digitizing is going to require more work than usual. Sometimes you will have to revisit it couple of times to ensure quality work. Good news is that you can and should charge more for this in comparison to regular embroidery as it will take more time and effort.
Conclusion
3D puffy foam embroidery is an essential these days and as a professional you should always be ready to take on this challenge. Though this type of embroidery is time taking and labor extensive, it does generate a lot better profits as the foam can be easily sourced from a reliable supplier. You can always turn a simple low paying project into a premium one by using this technique. However always follow complete steps and consider few rules when digitizing 3D foam embroidery for guaranteed results.