Did you ever see a cute embroidery design on the internet and wanted to add that right over your new dress?
Same! But, as an embroidery beginner, how can you ensure that the design you’re stitching on your embroidery machine is the same as the design you saw online?
That seems like a huge problem, but we can help. Scroll down to continue reading some easy-to-follow steps and get an embroidery design from a technology device to your embroidery machine.Importance Of Doing Embroidery By Following Online Designs
Before we discuss the process of getting embroidery designs to your machine, let us discuss a query that many people have. They ask if it’s necessary to stitch by following embroidery designs.
The answer is yes! Embroidery machines require digitized designs to stitch the same pattern on a piece of fabric. However, people can create their own on-fabric designs by doing embroidery on a sewing machine or by hand.
But why would you do that if embroidery on embroidery machines following online designs gives you so many benefits? Not only can you find thousands of options in online embroidery designs, but the designs also make the process easier and quicker! In addition, online embroidery designs also help people create large-scale embroidered pieces of fabric in less time while spending little money and effort.
People who’ve been doing embroidery for a long time can also create their own digitized designs, but we won’t suggest you or any beginners do that. For the time being, stick to designs available online and explore your creative side later in the process.What Do You Need To Get Embroidery Design To Your Machine?
You must have some things before you begin the process of copying embroidery designs to your embroidery machine. Here’s an entire checklist.
A computer, laptop, or other devices that you can use to search for embroidery designs
A USB that you will use to transfer the design
An embroidery machine, where you can paste the design and later stitch it onto a piece of fabric
Step-By-Step Process Of Getting Embroidery Designs To Your Embroidery Machine
Now that you’ve got the essentials ready for transferring embroidery designs to the embroidery machine, it’s time to jump right to the procedure. Read and follow these easy steps to get the task done!
Step # 1 — Find Your Embroidery Design On The Internet
The first and foremost step of getting embroidery designs to your embroidery machine is to find the right embroidery design on the Internet. People who’ve been stitching for some time know that the process is not as easy as you think. In short, we wouldn’t go as far as to say that the process of finding an embroidery design can easily be a hit or a miss!
A lot could go wrong while picking the embroidery design. For instance, you might end up picking an embroidery design that’s too complex. Moreover, you might also select an embroidery design that looks amazing on the screen, but once you stitch it on your embroidery design, it looks like a disaster.Here are some tips you should follow while picking embroidery designs online.
Consider Your Skill Level
Before you start looking for a design online, decide on a vague idea of the image you want to stitch on the fabric. This will narrow down your search for an embroidery design. Consider your skill level alongside to decide a theme. Some embroidery designs are easier to complete and stitch, while others could take a lot of time and effort. In addition, many things could go wrong if you pick up an embroidery design that is way beyond your skill level.
For example, if you’re a beginner, you should select easy patterns like a round ball instead of something intricate like a multi-layered butterfly. Line drawings are also easier to stitch than design patterns, where the stitcher has to fill in stitches inside a pattern with textured embroidery.Consider The Size Of Instructions Alongside
Do you know that some advanced embroidery designs come with a set of instructions alongside?
The platform even recommends the stitches styles and the directions for the stitches. On the other hand, some embroidery designs are simple images that the stitcher can transfer to a piece of fabric with little to no needlework. As a beginner, you should select images that don’t have many instructions since you might get confused transferring them to the machine and then fabric.Always Select Embroidery Designs Meant For Machine Embroidery
Do you know that the internet has different design options, each for cross-stitch embroidery, machine embroidery, and hand embroidery?
A design meant for one of these can’t substitute for the other, as each style’s designs and languages differ. Therefore, to transfer an embroidery design to your embroidery machine, you should select embroidery designs meant for machine embroidery.Determine If The Design Pattern Works For Your Project
One of the most critical steps while selecting an embroidery design online is determining that it matches your project. For instance, if you want to stitch your embroidery design on a wall decoration piece, don’t select an embroidery design for a garment. Dresses, bags, decorations, and cushions all have different design patterns. For instance, if you want to stitch embroidery on a dress, avoid using large-scale embroidery designs; instead, select small, delicate ones. In short, size relevancy is also crucial.
Select Reputable Embroidery Design Sources
Once you write embroidery designs on google, you’ll find millions of available options. But should you select just any?
The answer is a huge NO, as some of these sites have low-quality design patterns that look different on fabric than they do on the screen. Instead, select an embroidery design source from the first page and ensure that they’ve been in business for a long time. In addition, also check their reviews. For the first time, we don’t recommend purchasing a pattern online; instead, stick to the free ones.Step # 2 – Download The Embroidery Design
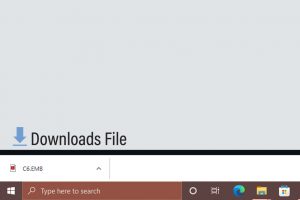
Once you’ve found the perfect embroidery design, the next step is simple – download the design! Different sites have different options for downloading an embroidery design, but you’ll find a download button or feature in most of them.
After downloading the design, wait for the design to download and appear in your downloads folder. In most cases, the design will appear as a zip folder. Open the zip folder to view its contents. You might see multiple files in the zip folder, but it’s nothing to worry about. Simply move to the next step.
Step # 3 – Transferring The Embroidery Design To A USB Stick
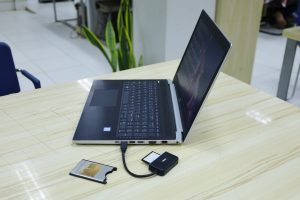
If you wondered where you’d be using the USB stick in the procedure, this is the step! Ensure that the USB is virus-free and has enough space on it for the downloaded file. Plug the USB stick into the USB port on your computer or laptop. Open the USB folder from the My Computer folder.
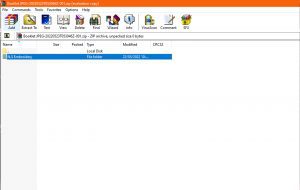
Extract the zip folder to have access to all the design files separately. Select the design files based on your embroidery machine. Here’s a list of the embroidery machine brands and which file format works for them.
Select the JEF file from the zip folder for a Janome embroidery machine.
Select the ART file from the zip folder for a Bernina embroidery machine.
Select the EXP file from the zip folder for a Melco/Bravo embroidery machine.
Select the DST file from the zip folder for a Tajima embroidery machine.
Select the PCD/PCM/PCS file from the zip folder for a Pfaff embroidery machine.
Select the xxxxxx file from the zip folder for a Singer embroidery machine.
Select the PES/PEC file from the zip folder for a Brother/Babylock/Deco embroidery machine.
Select the HUS/VP3/VIP file from the zip folder for a Husqvarna/Viking embroidery machine.
Once you’ve selected the file format according to your embroidery machine, copy and paste it to the USB folder.
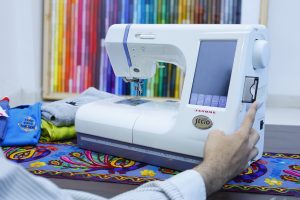
Step # 4 – Transfer The USB To The Embroidery Machine
Do you know that your embroidery machine also has a USB slot?
Simply insert your loaded USB into that port and open it on the screen by clicking the USB/cable logo on the bottom of your touch keypad. Select the design you pasted on the USB, and you’re good to go!
Conclusion
Embroidery designs available online are a great way to level up your embroidery skills. You can select a beginner’s design at the start and select more intricate designs once you continue the stitching journey. We hope this tutorial was helpful, and you’re ready to start stitching your first embroidery design after getting it on the embroidery machine.
Copyright © 2017 Candle. All rights reserved.