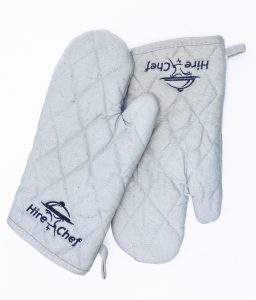
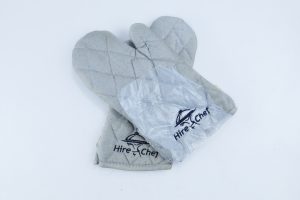
This the season of embroidered gloves! This project is an ideal project for winters, and customized embroidery on gloves make great gifts especially for winter holidays.
Embroidery on gloves is also relatively inexpensive, super easy to size and create and ends up adding so much more variety to your embroidery business.
However, an embroiderer who is new to embroidering on gloves may get intimidated by the vast options of needles, designs, choosing between manual embroidery and machine embroidery.
A part from these, the size of the glove and the difficulty of accessing it for embroidery makes it very tricky for any new embroiderer. The best idea is to stitch a monogram on the clubs on the outside of the wrists as it is easier to access and will not stitch the glove close.
In order to ease you into this craft, we have curated this article for you to create embroidery designs on your gloves.
What Supplies Would You Need?
Embroidery machine and appropriate hoop
Fabric of your choice
Self-adhesive sticky stabilizer
Sharp embroidery needle
Bobbin thread for embroidery
Pencil, ruler
A water-soluble fabric pen or chalk
And most importantly, your own design!
Types Of Stitches
If you are wondering what type of stitch to opt for, most popular stitches to choose from are:
A simples stitch also known as straight stitch used for detail work, single color drawings, outlining and shading.
Satin or glad stitch used for inside text and borders
Fill stitch used to fill patterns
Design Size And Considerations
There seem to be not too many secrets to creating your own design to be stitched on the gloves. To help you better visualize the design before you embroider it, digitize a small image or play around with the size of an existing design. When reducing design size, make sure the number of stitches decreases. That way, the design won’t be too dense and hard for the gloves.
Since it is easy to use sticky, self-adhesive tear-away stabilizer, choose a small design without super dense fill-stitches. Tearing away the stabilizer results in a nicer appearance to the back of the design.Let’s Get Started
Collect your supplies and enter your creative pool because now it is time to put into action all you have read and learned about embroidery on gloves!
Preparing The Stabilizer
Your first step is to tightly hoop a piece of ‘adhesive-backed stabilizer’ with the shiny side up as if it was a fabric. Then, use a pin to score the top paper layer of the stabilizer around the inside edge of the embroidery hoop, leaving the adhesive layer intact. Peel the paper away to expose the sticky surface.
Once done, open the seam as far as necessary to allow for smoothing the glove flat on the adhesive surface. Also, mark vertical and horizontal lines with a pencil to denote the center of the hoop and extend it to the edges of the hoop.
Preparing The Design
After turning the glove inside out and pushing back the back side expose the front face of the glove. Measure and mark the center point of the glove for the design, marking both right side and left side, and choose the spot to monogram on your gloves. The closer the embroidery to the edge of the gloves, the easier it will be to access.
Make sure that the positioning of the center point is the same on both the gloves and stick the glove onto the adhesive-backed stabilizer.
Fold the glove so you can align it with the intended center point of the design with the center point of the adhesive-backed stabilizer and smooth fabric over adhesive.
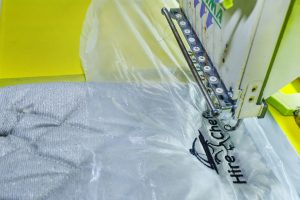
Embroidery On The Gloves
Before you start the embroidery, double check your design and determine the approximate size and position of your design by measuring the area of the glove you want to embroider. Don’t be afraid of experimenting with different colored threads and play around with different layouts and depths to create a nice-looking design as compact as possible. Just make sure it’s oriented the way you want it before you start embroidering. For easy access make sure that the embroidery is closer to the edge of the glove.
Now, before starting the machine, fit your hand into the glove just enough to stretch it slightly. Make sure not to over stretch it, as you don’t want the stitches to morph once you take your hand out of the glove. Use tape to ensure that the back side of the glove is held back and doesn’t touch with the front.
Get Your Machine Ready
Just plug in your design on the machine, press start, and watch your machine embroider the glove! Keep a close eye to make sure nothing goes away. Make sure that the design orientation is correct. Depending on your machine you may have a variety of options for moving letters and arranging and changing the array.
Once the first glove is finished, repeat the embroidery process on the second glove to make a pair. When the machine has completed the embroidery, put on the final touches by tearing the glove away from the adhesive backed stabilizer, trimming the sticking and left-over stitches, and removing the water-soluble stabilizer. Now you have the perfect gift for your friends or loved ones or even for yourself!Conclusion
It is so important to enjoy the process of experimenting with different designs and forms of embroidery, and equally important to not stress out if a particular design does not turn out the way you intended it to. Patience bears great outcomes.
After performing all the processes accurately, your dream glove will be designed and created successfully.However, if you don’t get the desired result, you can always make changes to your techniques and designs to attain the final product. Winter is near so now is a great time to put on your creative hat and start creating your perfect design and embroidered glove to either keep for yourself or introduce into your business!
The customers get attracted by the embroidery on gloves as it creates a very attractive perception in the viewer’s eye.
Copyright © 2017 Candle. All rights reserved.