Embroidery patches have been there in the market for quite some time but have gained traction over the years for being a creative way to communicate your style statement. These days you see them everywhere, scouting troops, cheer squads, sports teams etc.
Hence making them a mandatory part of your product assortment. Businesses that are not offering the patches are missing out on the tremendous growth that they can achieve. In order to reach full potential of your skills and business, it is pivotal to add them to your product line. Before starting, careful consideration should be given to material used for patches as it needs to be smooth and dimensionally stable in order to minimize mutilation during embroidery. If you follow the basics, you can achieve remarkable results as the creation steps don’t differ much between the various materials, we will begin with the fundamentals and clarify a few varieties along the way.Importance And Need Of Patches By The Customer
Machine embroidered patches are very convenient for customers in terms of cost and application. they are usually inexpensive and can be applied easily with the help of iron. anyone can easily attach them with the help of ironing technique which makes them. They also come in different varieties and graphics which makes them ideal way of self-expression. They are also easily removable which gives customers the opportunity to update them whenever they want
Machine embroidered patches are very convenient for customers in terms of cost and application. they are usually inexpensive and can be applied easily with the help of iron. anyone can easily attach them with the help of ironing technique which makes them. They also come in different varieties and graphics which makes them ideal way of self-expression. They are also easily removable which gives customers the opportunity to update them whenever they want
Setting Up An Embroidery File To Make A Patch
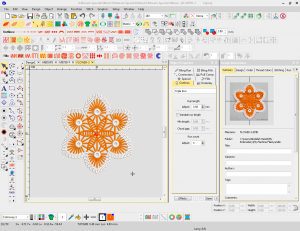
Clients regularly need a particular sign or image realistically transformed into a patch. If so, you will initially have to get the design digitized into an arrangement reasonable for your embroidery machine. You will need to tell your digitizer that you will line this out as a patch and what shape and size you need the final product to be. This is because the digitizer should digitize realistically just as additional rounds of embroidery to complete the external edge of the patch. If you get a patch demand dependent on a previous appliqué configuration, you don’t have to repeat the additional steps in setting up the document.
Once, you’ve created the vector drawing as per your need, save it as a legacy format or an old version of your usual design if your vector software gives you an error message.
What Fabric Is Best For Embroidery Patch
Patches are a speedy and straightforward approach to connect embroidery to any surface, whether the need is intended for an emblem or no particular reason. The most common base texture for patches is felt or twill, yet any rigid fabric will work, when combined with a quality fusible warm stabilizer.
Important Items For Making A Patch
Appliqué configuration record or consolidated document as depicted previously
Foundation texture of patch. You can utilize thin material, yet you will probably need to combine several layers of interfacing to make it sturdy.
Water solvent stabilizer (WSS)
A little piece of Heat Band Lite
Design and vector graphics editing software like Illustrator or Inkscape
Embroidery software like Drawings and old Husqvarna VIP software
A USB drive or whatever hardware you need to get your embroidery files onto your machine
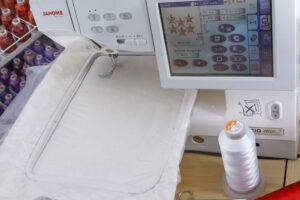
An embroidery machine, Whatever brand feasible for you
Embroidery hoops that work with your machine
Stabilizer, mostly used water-soluble Aqua Magic.
Fabric, preferably white embroidery nylon
Polyester embroidery thread
Polyester bobbin thread
Some damp paper towels
A heat proof surface of some description
A hot knife, essentially a wood-burning tool with a small chisel tip.
Iron-on backing
Parchment paper
Scissors An iron
Do you know, you can quickly get a patch-making unit with complete provisions you need PLUS a lot of fun fix plans!
What Are Steps Of Making Patches On Embroidery Machine?
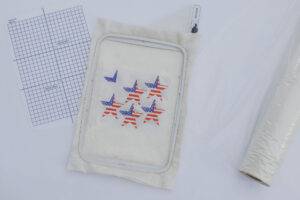
Loop a piece of water dissolvable stabilizer (WSS).
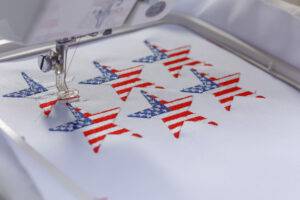
Line out the first round of embroidery of your appliqué plan. This fills in as a guide line to show you where to set out your appliqué texture.
Set out your appliqué texture over the embroidery position.
Line out your next round of embroidery. This is your tack-down that gets your appliqué texture to the WSS.
Eliminate your loop from the weaving machine. Utilizing appliqué scissors, trim your appliqué texture near the tack-down.
Start your next round of embroidery, the silk sewing for the external edge of your patch.
Line out the next round or adjust the embroidery.
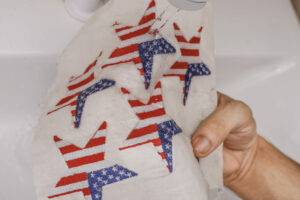
Eliminate the patch from the band and trim off the WSS. Wet the hole to eliminate any leftover WSS. If you are stressed over the edges fraying, apply a Fray Check to the external border.
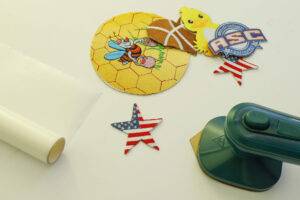
Follow your patch onto the Headband Lite and cut it out.
Breaker the Heat N Bond Lite onto the rear of the fix.
Strip away the pressing on the Heat N Bond Lite. The patch is currently fit to be attached to anything
Once hot knife is hot, trim the excess nylon from around your patches. Wipe the melted gunk off your hot knife. Always run a clean part of the hot knife along an edge to seal it further after cutting a stroke. You’re done! Enjoy your new embroidered patch! Iron it onto something, sew it onto something, or do whatever you do with your patches.
Customize Option Of Sewing Or Ironing On A Patch?
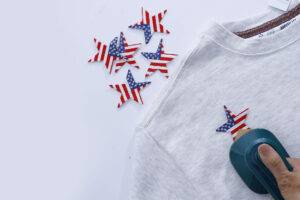
While specific individuals lean toward iron patches for that particular explanation, a sew-on patch is likely much better. It is sturdier, looks better, and adds an innovative touch when the product calls for it. Yet it is also fine to use iron to affix them on the surface.
Conclusion
Your commercial embroidery business can begin making custom patches immediately. Iron-on embroidered patches are simple and easy to create with your embroidery machine and can be very profitable. You can share embroidery patches as your artistic piece with the world. They can easily be attached to a cap, backpack, or jacket.
Copyright © 2017 Candle. All rights reserved.